

Pumpkin Carving Ideas That Work for Every Skill Level
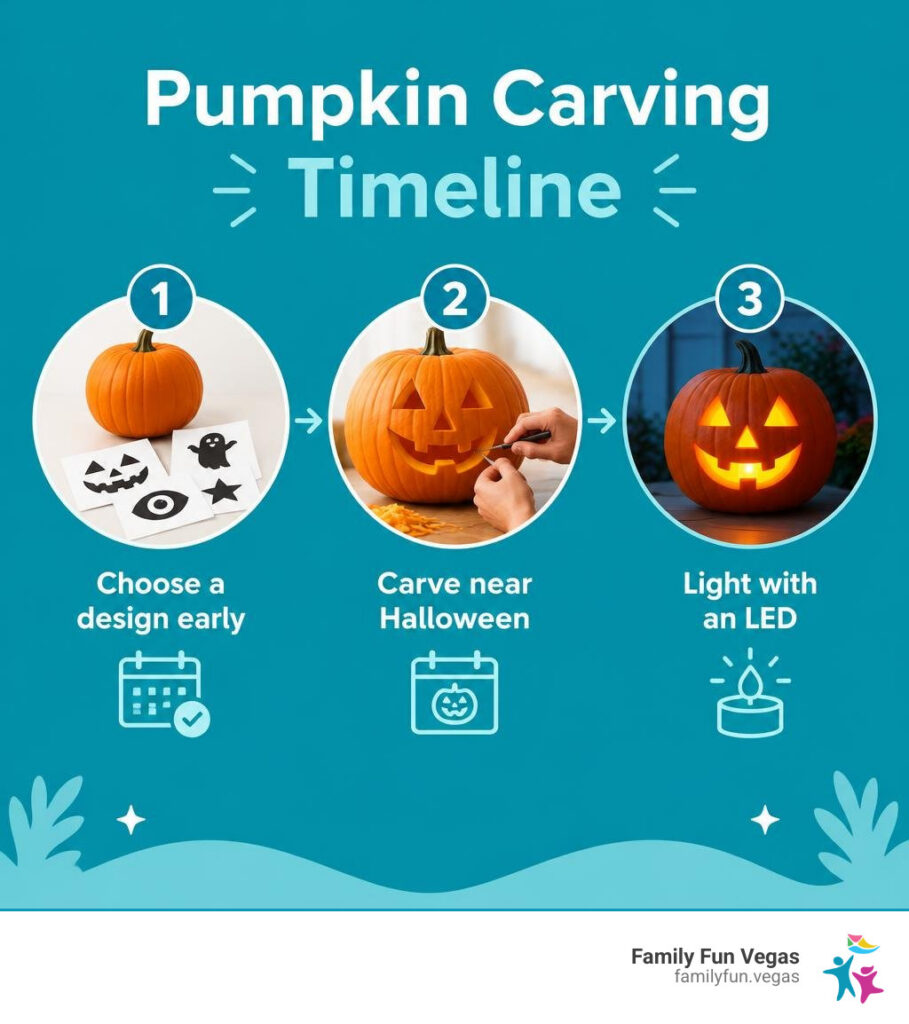
Start with bold shapes: a classic face, a ghost, or one oversized eye. For a different look, drill a pattern of stars or scrape away the outer skin to make a moon or leaf glow without cutting through the pumpkin. Choose a firm pumpkin with a smooth, flat side, and let an adult handle sharp tools.
For Halloween 2026, geometric patterns and nature scenes offer fresh options alongside familiar jack-o’-lanterns. If your Las Vegas porch is warm, carve close to Halloween so your design looks its best on the night.
Pumpkin carving ideas helpful reading:
Essential Tools and Techniques: Carving, Relief Etching, and Drilling
When bringing your seasonal designs to life, choosing the right method makes all the difference between a messy kitchen disaster and a neighborhood showpiece. Traditional full cut-through carving remains a staple, but relief etching and cordless drilling have surged in popularity for modern porch decorators.
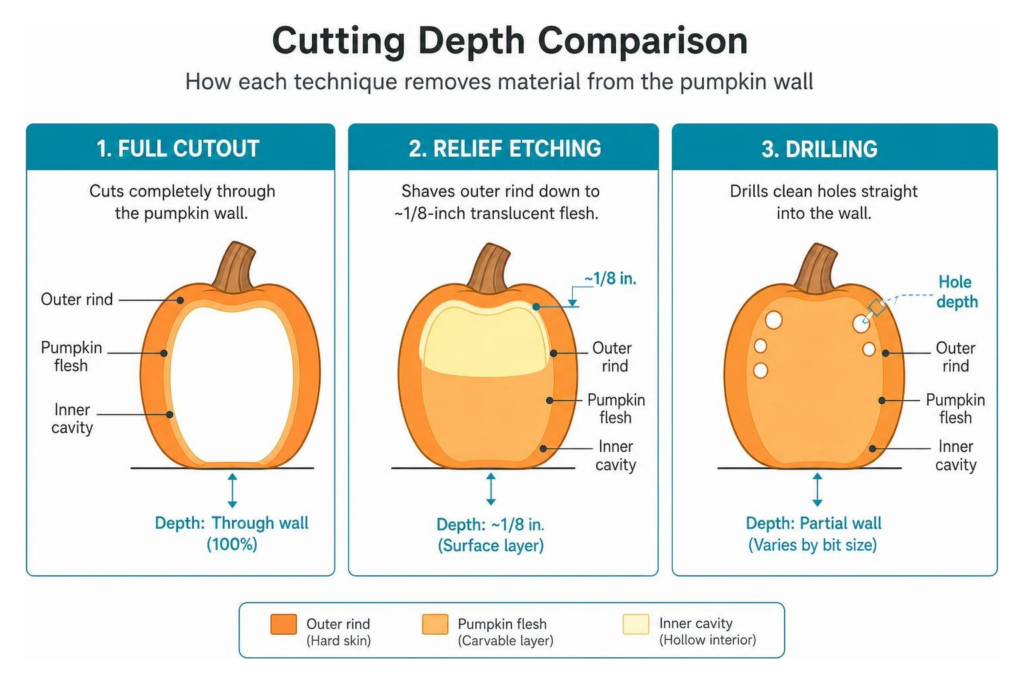
Here is how each method compares in effort, tools, and visual appearance:
| Technique | Primary Tools | Depth / Process | Finished Look Lit | Best Suited For |
|---|---|---|---|---|
| Traditional Cut-Through | Serrated pumpkin saw, sturdy metal scoop | Cuts completely through the pumpkin wall | High-contrast, bright yellow-gold silhouette | Classic jack-o’-lanterns, bold cutout shapes |
| Relief Etching (Shadow Carving) | Clay loop tools, linoleum cutters (V/U gouges) | Shaves outer rind down to ~1/8-inch translucent flesh | Soft, warm, multi-tonal ambient glow | Portraits, woodland scenes, intricate botanical art |
| Pattern Drilling | Cordless drill with varied bit sizes (1/8″ to 1/2″) | Drills clean geometric holes straight into the wall | Crisp points of light, constellation effect | Polka dots, starlight patterns, modern lanterns |
For the cleanest cut-throughs, ditch flimsy kitchen knives in favor of dedicated fine-toothed craft saws. When you want to explore more intricate textures and glowing depth, try Creative Pumpkin Carving Ideas to Try This Halloween using lino tools. Always scrape the pumpkin’s interior wall down to about one inch of thickness where you plan to work—this gives you smooth, effortless resistance whether sawing or gouging.
Selecting the Best Pumpkin Shape
The success of your project starts before you make your first incision. When visiting local farm stands or markets around Clark County, look for pumpkins tailored to your chosen concept:
- Round, Flat-Front Silhouettes: Ideal for complex stencil transfers and wide geometric layouts. A flat surface prevents distortion when taping down patterns.
- Tall, Narrow Gourds: Perfect for looming characters, spooky silhouettes, or standing skeleton motifs.
- Squat, Wide Pumpkins: Provide the ideal canvas for broad grins, creeping monsters, or multi-layered relief scenes.
- Firm Rind and Sturdy Stems: Never lift a pumpkin by its stem. Pick heavy, unblemished gourds without soft spots, ensuring maximum structural integrity throughout the carving process.
Precision Stencil Transfer and Delicate Cutting Strategies
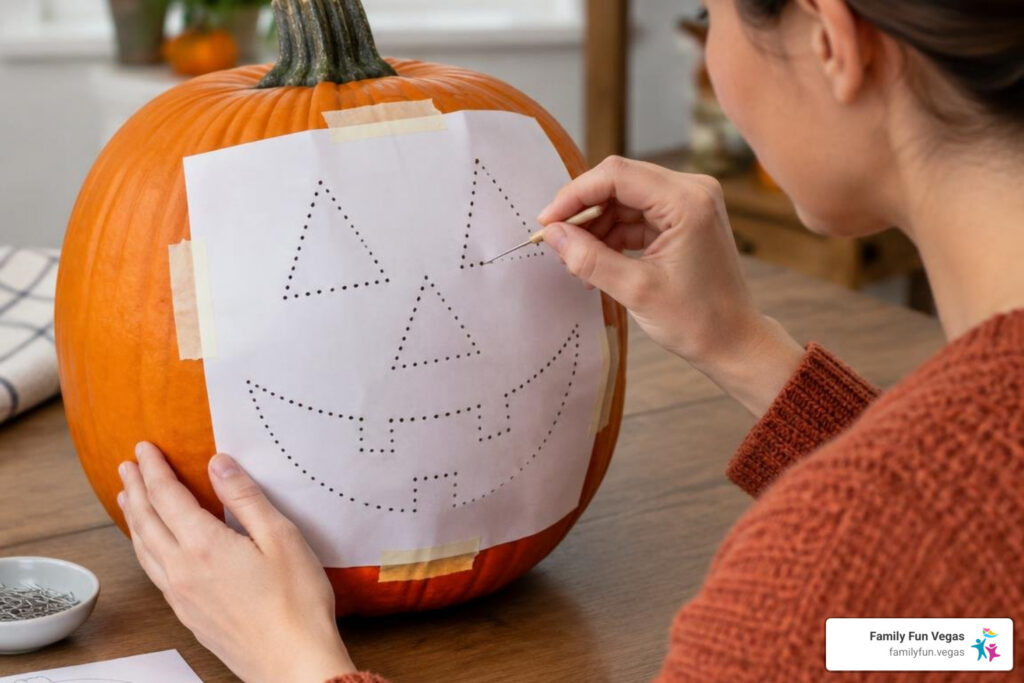
Transferring a detailed design onto a curved, slippery pumpkin doesn’t require artistic genius. Using the pin-poke technique guarantees crisp accuracy every single time:
- Prep the Surface: Thoroughly wash and dry your pumpkin. A completely dry rind ensures painter’s tape holds securely.
- Flatten the Pattern: Make small relief cuts along the outer edges of your printed stencil paper so it wraps smoothly against the curved rind without bunching.
- Poke the Guide Marks: Using a pushpin, awl, or poking wheel, pierce small holes through the paper along every outline, spacing them roughly 1/16 to 1/8 inch apart.
- Connect the Dots: Remove the paper and connect the pinholes with a washable or dry-erase marker. If you make a mistake, wipe it clean with a damp towel.
To keep delicate features from snapping off, follow a strict center-outward cutting order. Always carve the smallest, finest inner details first while the surrounding pumpkin wall is still structurally solid. Leave wide support bridges—at least half an inch of intact rind—between adjacent cutout sections. You can find inspiration across regional styles, such as Oregon-Themed Pumpkin Carving Ideas For Halloween, which showcase how maintaining thick wall bridges preserves fine details.
Trending and Unique Pumpkin Carving Ideas for 2026
According to recent data from the National Retail Federation, 42 percent of consumers plan to carve a pumpkin this season, contributing to the broader $4.2 billion spent on seasonal holiday decorations. In 2026, porches are showcasing a balance of sophisticated modern art and timeless spooky charm during Halloween.
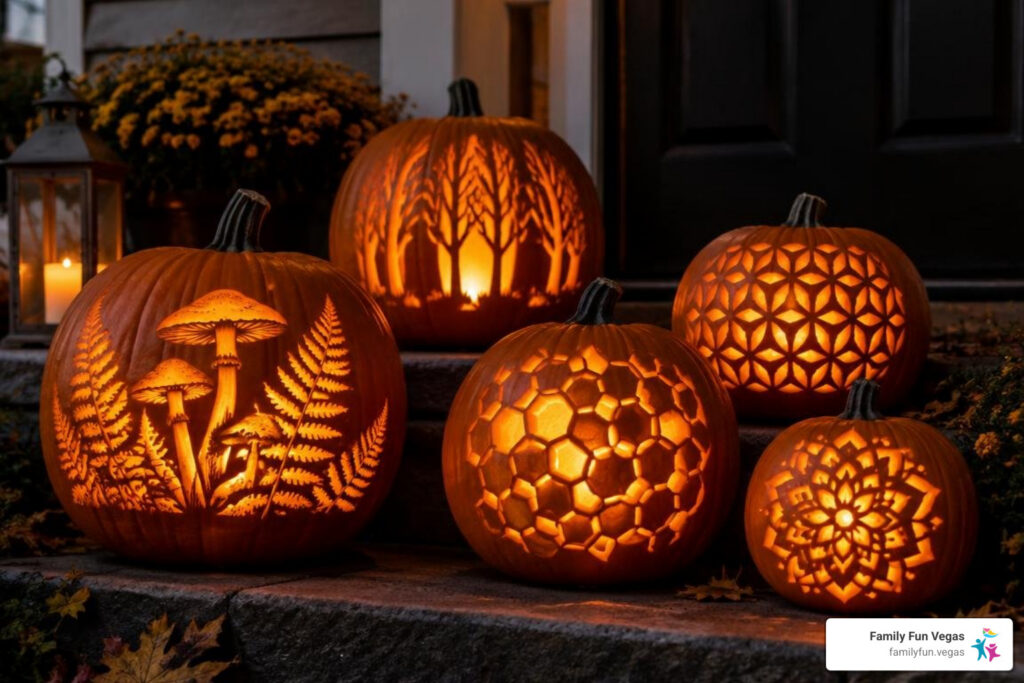
- Botanical Reliefs and Forest Silhouettes: Cottagecore and woodland motifs—such as layered mushroom clusters, ferns, and bare moonlit trees—dominate trend reports. Shaving away the orange rind while leaving the pale pulp creates an ethereal forest glow.
- Modern Honeycombs and Sacred Mandalas: Symmetrical geometric patterns using repeating hexagons or radial mandala cuts create striking, upscale lanterns that double as modern patio lighting.
- Negative Space Carving: Instead of cutting out the subject, carve away the massive background around a dark, uncarved silhouette (such as a crouching black cat or flying raven) for high-drama contrast.
Top Pumpkin Carving Ideas for Beginners
If you are carving with little ones or tackling your very first pumpkin, focus on bold, high-impact shapes that require minimal fine blade work:
- Expressive Classic Faces: Oversized triangle eyes, curved eyebrows, and wide toothy grins. Crooked teeth look entirely intentional, easily hiding beginner slip-ups.
- Cookie-Cutter Punchouts: Place a metal cookie cutter (stars, bats, or crescent moons) against the rind and gently tap it with a rubber mallet to punch clean silhouettes with zero knife slips. Pair this activity with our recommended 10 Awesome Halloween Safety Tips for Las Vegas Parents to keep crafting sessions safe and enjoyable.
- Drilled Constellations: Mark star maps with a pencil and drill varying hole sizes across the face of the gourd for a celestial glow that takes under ten minutes to complete.
Creative Pumpkin Carving Ideas for Small Pumpkins
Small pie pumpkins and miniature gourds pack tremendous visual punch when matched with appropriate designs:
- Oversized Monster Eyes: Carve a single giant, detailed eye or cyclops pupil across the front of a small pumpkin, placing it on top of a larger uncarved pumpkin body.
- Punched Star Luminaries: Scatter tiny drill holes across mini white or orange gourds to line your front walkway steps.
- Monogram Luminaries: Carve a single bold family initial on smaller pumpkins to frame your doorway with personalized curb appeal.
Multi-Pumpkin Displays and Porch Storytelling
A collection of coordinated pumpkins creates a far more memorable experience than a single standalone jack-o’-lantern. You can incorporate them into complete porch setups alongside our guide to safe DIY haunted house ideas for kids.
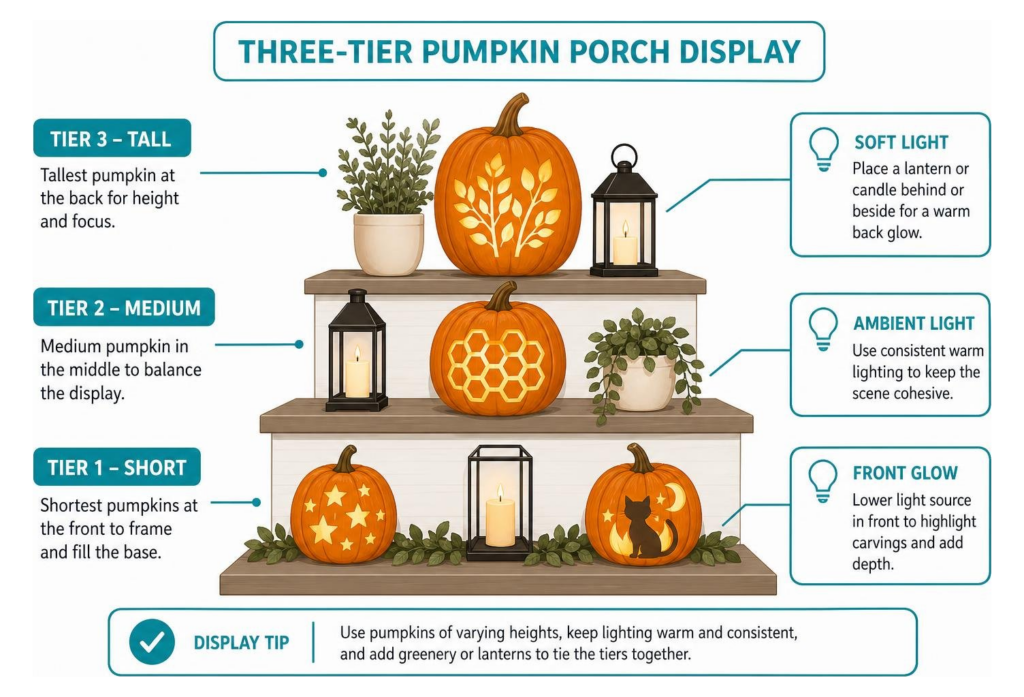
- The Staggered Porch Village: Cluster three to five pumpkins of varying heights on wooden crates or stair steps. Keep the color palette and lighting temperature consistent so the vignette feels deliberate rather than cluttered.
- Vertical Scarecrow Totem: Stack three graduated pumpkins vertically onto a half-inch wooden dowel or metal rod driven into a heavy base, carving coordinating facial features, shirt buttons, and belt buckles onto each tier.
- Story Scenes: Carve a fleeing ghost on a small pumpkin positioned right next to a wide-mouthed monster pumpkin that appears to be chasing it up the steps.
Safe Lighting and Longevity Preservation Tactics
Carved pumpkins in dry, warm climates face a common enemy: rapid dehydration and mold. South Dakota State University Extension notes that storing pumpkins between 50°F and 60°F maximizes their lifespan. In warmer southwestern regions like Nevada, follow these tested preservation strategies to keep your porch glowing bright throughout the festivities in our 31 Days of Halloween Fun:
- Seal the Exposed Edges: Immediately after carving, apply a thin coat of petroleum jelly along all cut edges and interior walls. This locks in moisture and prevents premature shriveling by up to 3 to 5 days.
- Sanitizing Bleach Mist: Spray the carved cavity with a solution of 1 teaspoon household bleach per quart of water every other day to eliminate mold spores and bacterial growth.
- Opt for Battery-Powered LEDs: Open flame candles generate excessive interior heat that quickly cooks and shrivels pumpkin flesh. Swap them for battery-powered LED tea lights, high-lumen LED pucks, or warm white fairy lights. LEDs are completely fire-safe, wind-resistant, and keep the interior cool.
Kid-Friendly No-Carve Alternatives and Family Activities
For toddlers and younger crafters who want to participate without sharp tools, no-carve decorating provides hours of mess-free entertainment:
- Decoupage Botanicals: Collect colorful pressed autumn leaves or patterned paper napkins and adhere them to smooth white pumpkins using non-toxic craft sealant.
- Googly-Eye Clusters: Cover mini pumpkins in dozens of self-adhesive googly eyes in assorted sizes for a whimsical, friendly monster effect.
- Matte Acrylic Character Painting: Paint cheerful ghost faces, vibrant sugar skulls, or superheroes directly onto clean gourds.
- Felt Attachments: Cut out bat wings, cat ears, and vampire capes from stiff felt sheets and attach them using kid-safe craft glue.
Picking out fresh gourds is half the fun! Explore our curated family guide to finding the perfect local pumpkin patch across the valley to pick up your canvas before starting your craft night.
Frequently Asked Questions About Pumpkin Carving
How long before Halloween should you carve a pumpkin?
Carve your pumpkin 3 to 5 days before Halloween for traditional cut-through designs, especially in mild or warmer climates. Relief-etched pumpkins can last up to 7 days because the inner membrane remains largely intact. Carving too early risks rot, mold, and wilting before trick-or-treaters arrive.
How do you carve a pumpkin without cutting all the way through?
Use a clay loop tool, linoleum gouge, or fruit zester to scrape away only the tough outer orange skin (the rind). Once the skin is removed, gently thin the light-colored flesh underneath down to about 1/8-inch thickness until light shines softly through the wall when illuminated from within.
What tools do you need for detailed pumpkin carving?
For detailed work, skip cheap generic kits and use:
- A fine-toothed craft or drywall saw for clean, straight cutout lines.
- Linoleum cutting handles with #1 V-shaped and U-shaped gouge blades for fine etching.
- A stainless steel ice cream scoop or clay scraper for thinning pumpkin walls.
- A pushpin or transfer wheel for transferring printed stencils.
- A cordless drill with assorted standard drill bits for precise holes.
Conclusion
Carving pumpkins is one of our favorite seasonal traditions, bringing families together to make lasting memories while transforming simple porch steps into imaginative works of art. Whether you decide to etch a detailed forest portrait, punch stars with a drill, or paint colorful characters with your kids, planning your design and following smart preservation habits ensures your display shines bright all week long.
Ready to find the ideal pumpkins for your home display? Explore our complete directory of top local family pumpkin patch locations across Henderson and Clark County, curated by Family Fun Vegas to help you find trusted, family-friendly seasonal fun!